Manage Shipping and Billing Details
PayTabs provides you with the backend packages that make the integrating with PayTabs payment gateway very easy by providing ready-made classes that handle the payment process.
This article is dedicated to walking you through how to manage/manipulate both shipping and billing/customer information in the Node.js package, as shown below:
Code Sample:
Those two methods indicate the customer/billing details and shipping details for the initiated payment. Only if provided the payment page will be prefilled with these data.
let customer = {
    name:"Technical Support",
    email:"[email protected]",
    phone:"+966 55 xxxxxx6",
    street1:"Street address",
    city:"jeddah",
    state:"01",
    country:"SA",
    zip:"52121",
    IP:"10.0.0.1"
}


let customer_details = [
    customer.name,
    customer.email,
    customer.phone,
    customer.street1,
    customer.city,
    customer.state,
    customer.country,
    customer.zip,
    customer.IP
];

let shipping_address = customer_details;
The customer details are still required and must be passed, in case any of the details are missing or passed with invalid values; the cardholder will be required to enter any of the missing details on the payment page
Method Parameters:
The following parameters are required to be sent within the function but optional to be sent within the createPaymentPage function, as shown below:
Customer Details:
| Parameter | | |||
|---|---|---|---|---|
| Description | Indicates the customer details for this payment. If provided, the payment page will be prefilled with the provided data. To know more about this parameter please click here. | |||
| Data Type | OBJECT | |||
| Required | ✘ | |||
| Sample | | |||
Shipping Details:
| Parameter | | |||
|---|---|---|---|---|
| Description | Indicates the customer shipping details for this payment. If provided, the payment page will be prefilled with the provided data.. | |||
| Data Type | OBJECT | |||
| Required | ✘ | |||
| Sample | | |||
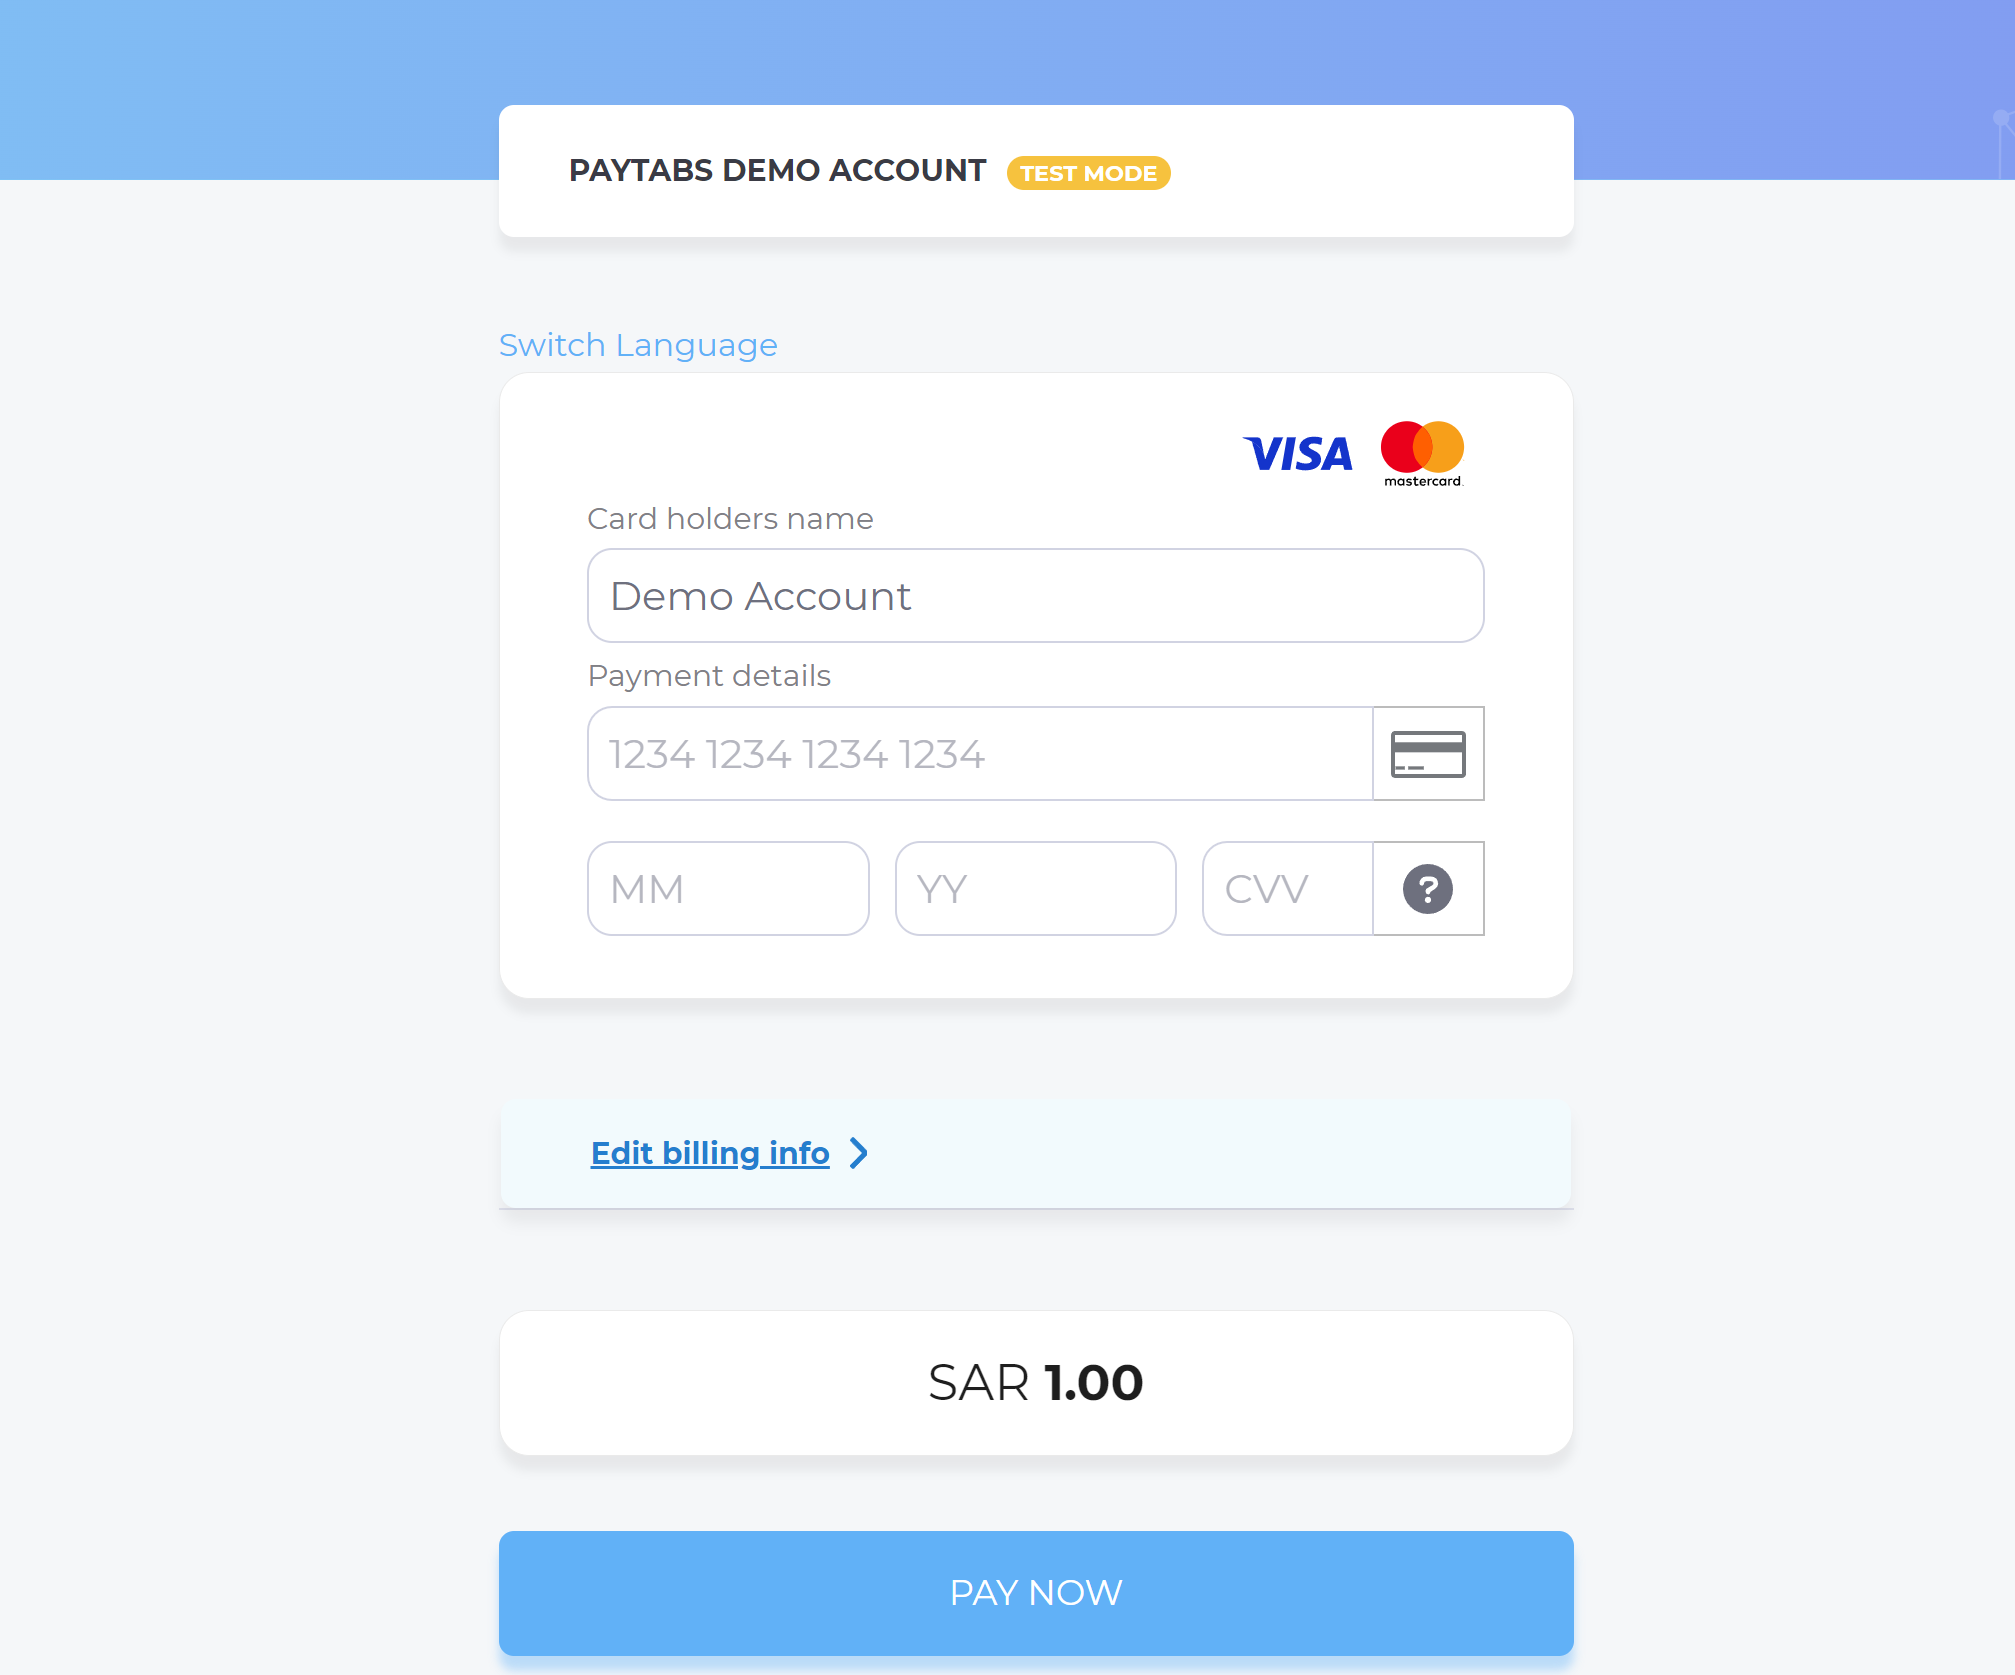
Expected payment flow behaviour:
- As a merchant you would initiate a payment request per the above Specifications, which include a sample code.
- Then, after generating the payment page use the result to redirect the customer to the payment page.
function callbackMethod(result) {
    //failed to create the payment page.
    if (result['response_code:'] === 400) {
         // get the message
         console.log(result['result']);
         // Next step
    }
    //success to create the payment page.
    else {
        //On success, redirect the customer to complete the payment.
        console.log(result.redirect_url);
        // Next step
    };
}

paypage::sendTransaction('sale','ecom')
  ->sendCart("Order_101", 1000.00, 'Order Description')
->create_pay_page(); - After this, your customer would proceed normally with payment by choosing the preferred payment method (if available), and providing his card information.
- Then, he will be redirected to his issuer bank 3DS/OTP page to authenticate the used card
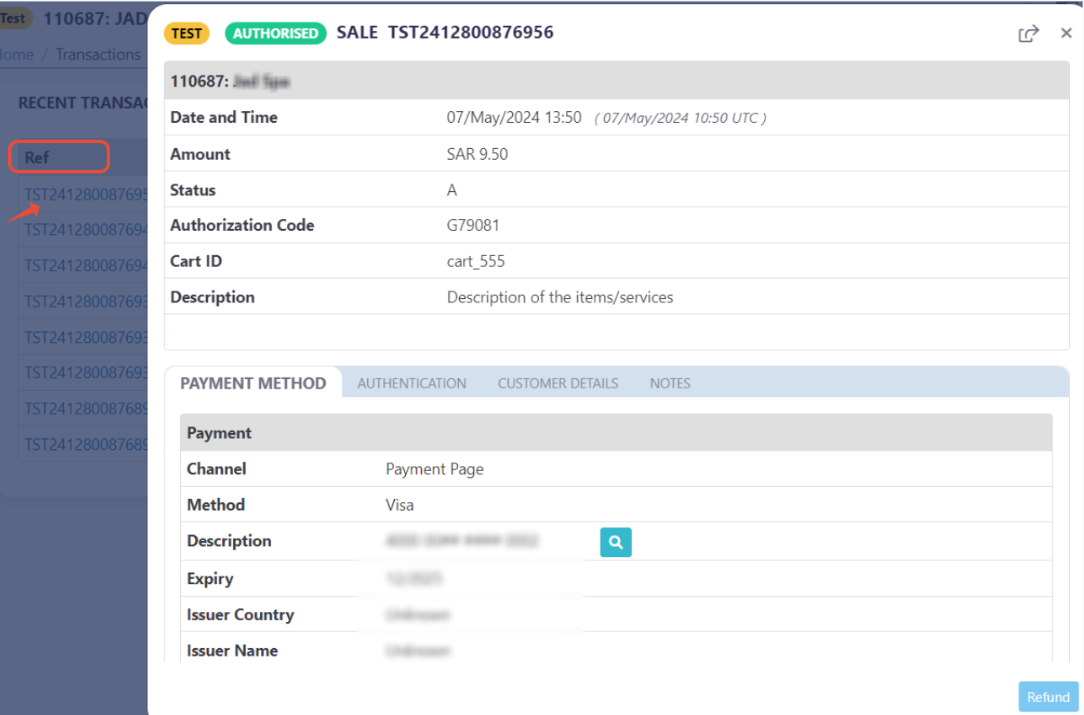
- Finally, he would be redirect to a success/error page accordingly. By this time, you will be able to see his transaction on your merchant dashboard, whether it's accepted/authorized or not.