Send The Invoice
An invoice is a document you send to your client after purchasing goods or services from you, both as a means of recording the sale and requesting payment from them. You can catch everything you need about PayTabs invoices in our solutions article: What is PayTabs Invoice?
Invoices Payment Page integration type is suitable for merchants with PCI SAQ A or merchants does not have any PCI levels as it follows Hosted Payment page mechanism. To customize the UI of the Invoices payment page, check this article, and to know more about the Invoices Payment Page PCI DSS merchant requirements, please check this article.The Available Ways to Send an Invoice
In this manual, we'll guide you through how you can send an invoice to your customers. You'll learn about the necessary parameters required for the request and all the optional parameters available. You can choose to send an invoice in one of two ways: While creating the invoice itself or After creating the invoice. We strongly recommend reviewing theInvoice Payment Page | Payment Workflowmanual first to understand the business logic behind this integration.
As mentioned above, there are two ways you can send an invoice to your customers as clarified below:
Each way has a different flow and support different kind of parameters, you can choose one that suits your business needs best. In the upcoming section we will walk you through these 2 ways in detail.
While Creating the Invoice
While Creating the Invoice
This parameter ONLY working with those integration types (Invoice).
In the realm of making your digital transactions more easier and smoother, PayTabs offers robust solutions for sending your invoices via the Invoices APIs. This section delves into two specific methods: sending invoices via SMS or email.
By leveraging these API parameter, businesses can streamline their invoicing processes, ensuring timely and efficient payment requests. Whether opting for the immediacy of SMS or the comprehensive reach of email, these tools provide versatile options to meet diverse business needs.
The notifications parameter is used to send automated notifications to customers when an invoice is generated. This ensures that customers are promptly informed about their invoices, which can help in speeding up the payment process and improving customer satisfaction.
How this parameter could benefit you?
The notifications parameter offers two primary options for sending invoices to customers: via SMS and via Email. Each method has its unique advantages, allowing merchants to choose the most effective way to reach their customers.
Sending Invoices via SMS
- Instant Delivery: SMS notifications are delivered almost instantly, ensuring that customers receive their invoices promptly.
- High Open Rates: SMS messages typically have higher open rates compared to emails, increasing the likelihood that customers will see and act on their invoices.
- Convenience: Customers can access their invoices directly from their mobile devices, making it easy for them to review and pay on the go.
Sending Invoices via Email
- Detailed Information: Emails can include more detailed information and attachments, providing customers with all the necessary details about their invoices.
- Branding: Merchants can manage the email address sending the invoices to customers by using his own domain via SendGrid to match their branding, enhancing the customer experience.You Should KnowWe highly recommend you check how you can customize the email address with your brand business domain by checking ourHow to integrate my PayTabs account with my SendGrid account?tutorial article.
- Detailed Information: Emails can include more detailed information and attachments, providing customers with all the necessary details about their invoices.
Name but a few different Businesses/Industries that can benefit from this API parameter:
- E-commerce: Online retailers can use the notifications parameter to promptly inform customers about their invoices, ensuring timely payments and improving cash flow.
- Freelancers and Consultants: Independent professionals can automate their invoicing process, reducing administrative tasks and ensuring clients are promptly notified about their payments.
- Subscription Services: Companies offering subscription-based services can use this feature to notify customers about recurring invoices, helping to maintain a steady revenue stream.
- Healthcare Providers: Clinics and medical practitioners can send invoice notifications to patients, ensuring they are aware of their payment obligations and reducing the likelihood of missed payments.
- Educational Institutions: Schools and universities can use the notifications parameter to inform students and parents about tuition fees and other charges, streamlining the payment process.
- Educational Institutions: Schools and universities can use the notifications parameter to inform students and parents about tuition fees and other charges, streamlining the payment process.
- Utility Companies: Utility providers can notify customers about their bills, ensuring timely payments and reducing the risk of service interruptions.
Limitations
- Maximum of Five Recipients: One limitation of the
notificationsparameter is that it can only send notifications to a maximum of five notifications per invoice whether via SMS or Email. This restriction might be a constraint for businesses that need to notify more than five recipients about an invoice.
How to Use?
In order for you to start use the notifications feature, you kindly need to follow the below simple steps:
- Within theinitiation the request payload of the invoiceyou will use the optional parameter
notificationswithin theinvoiceobject itself. - Inside this optional parameter (object)
notifications, you should pass one the following optional parameters (objects) as clarified in the below sample:be aware ofBothemailsandphone_numberscannot be passed together inside thenotificationsobject. If they appear together in any of the sample codes here, it is JUST for educational purposes to demonstrate all the fields.- Send Via Email
- Send Via SMS
{
    "invoice": {
            "shipping_charges": 0,
            "extra_charges": 0,
            .
            .
            "notifications":{
                          "emails":["[email protected]","[email protected]"]
            }
}
{
"invoice": {
"shipping_charges": 0,
"extra_charges": 0,
.
.
"notifications":{
"phone_numbers":["+9665123456789"]
}
} - Once you post your request, you will receive a response that includes either a redirect URL, or an invoice link (depending on how you initiated it. To know moreclick here).
"redirect_url": "https://secure.paytabs.com/payment/page/599458B182E5B6B********************B4818688","invoice_link": "https://secure.paytabs.com/payment/request/invoice/2072841/A8CB***************B762A", - Finally you will need navigate/redirect your customer to the the previous mentioned link as this is crucial for your customer to proceed through the payment process. You may need to check his customer experience after in the coming Expected Payment Flow Behavior.
Parameter Specifications
| Parameter | | |||
|---|---|---|---|---|
| Description | This is the main object that holds other parameters related to invoice creation. Including this in your request is considered the main flag to be treated as an Invoice creation request, not a normal hosted payment page request. | |||
| Data Type | OBJECT | |||
| Required | ✘ | |||
| Validation Rules | At least line_items must be included. | |||
| Sample | | |||
| Nested Parameter | Data Type | Min | Max | Required |
| STRING | N/A | N/A | ✔ |
| This is parameter will define the invoice page languages. | ||||
| ||||
| BOOLEAN | N/A | N/A | ✔ |
| This parameter will disable editing the invoice through the merchant dashboard. | ||||
| ||||
| DECIMAL | 0.01 | 9999999999.99 | ✔ |
| Indicates the shipping charges that the merchant would add to the total invoice amount if he or she has shippable items. | ||||
| ||||
| DECIMAL | 0.01 | 9999999999.99 | ✔ |
| Indicates any extra charges that the merchant would add to the total invoice amount. | ||||
| ||||
| DECIMAL | 0.01 | 9999999999.99 | ✔ |
| Indicates an extra discount that the merchant would exclude from the total invoice amount. | ||||
| ||||
| DECIMAL | 0.01 | 9999999999.99 | ✔ |
Indicates the total amount of the invoice which equals the total price of line_items plus shipping_charges + extra_charges minus extra_discount. Notes that if left as 0 or null it will be auto-calculated. | ||||
| ||||
| DATE | N/A | N/A | ✔ |
| Indicates the invoice activation date, which will make the invoice unavailable before this date. | ||||
| ||||
| DATE | N/A | N/A | ✔ |
| Indicates the invoice expiry date which will make the invoice unavailable after this date. | ||||
| ||||
| DATE | N/A | N/A | ✔ |
| Indicates the invoice due date which will make the invoice unavailable before this date. | ||||
| ||||
| OBJECT | N/A | N/A | ✔ |
| This is an array of the invoice objects/items that your customer purchased. Each item will be an object that holds its specific details. | ||||
| ||||
| Nested Parameter | Data Type | Min | Max | Required |
| DECIMAL | 0.01 | 9999999999.99 | ✔ |
| Indicates this invoice item cost. It must be in the same currency passed already in the Initial Request Parameters. | ||||
| INT | 1 | 9999999999 | ✔ |
| Indicates the purchased quantity of this invoice item. | ||||
| STRING | N/A | N/A | ✔ |
| Indicates the SKU of a certain item to be included with item details. | ||||
| STRING | N/A | N/A | ✔ |
| Indicates the item description to be included with the item details. | ||||
| STRING | N/A | N/A | ✔ |
| Indicates the item URL to be included with the item details. | ||||
| DECIMAL | 0.01 | 9999999999.99 | ✔ |
| This parameter indicates the net price of the current item without applying tax or discount. | ||||
| DECIMAL | 0.01 | 9999999999.99 | ✔ |
| This parameter indicates the discount rate for the current item. The rate is a percentage value that will be multiplied by the net price of the item and will be included in the total price of the item. | ||||
| DECIMAL | 0.01 | 9999999999.99 | ✔ |
| This parameter indicates the discount amount for the current item. This amount will be excluded. | ||||
| DECIMAL | 0.01 | 9999999999.99 | ✔ |
| This parameter indicates the tax rate for the current item to be included in the total price of the item. | ||||
| DECIMAL | 0.01 | 9999999999.99 | ✔ |
| This parameter indicates the tax total for the current item to be included in the total price of the item. | ||||
| DECIMAL | 0.01 | 9999999999.99 | ✔ |
| This parameter indicates the total price of the current item to be included with the item details. | ||||
Request & Response Payloads Samples
- Invoices
The below sample request payload will show you how you can pass the above-mentioned required parameter/s, which are needed to be passed with valid values to perform a request. Along with the response payload received after using this request payload.
emails and phone_numbers cannot be passed together inside the notifications object. If they appear together in any of the sample codes here, it is JUST for educational purposes to demonstrate all the fields.- Request Sample Payload
- Response Sample Payload
{
    "profile_id": {{profile_id}},
    "tran_type": "sale",
    "tran_class": "ecom",
    "tokenise": 2,
    "cart_currency": SAR,
    "cart_amount": "9.5",
    "cart_id": "cart_12345_2",
    "cart_description": "Test Description",
    "hide_shipping": true,
    "customer_ref":"CUST0101",
    "invoice": {
            "shipping_charges": 0,
            "extra_charges": 0,
            "extra_discount": 0,
            "total": 0,
            "expiry_date": "2023-10-27T13:33:00+04:00",
            "due_date": "2023-10-26T12:36:00+04:00",
           "notifications":{
                "emails":["[email protected]","[email protected]"],
                "phone_numbers":["+9665123456789"]
           },
        "line_items": [
            {
                "sku": "sku",
                "description": "desc",
                "url": "https://www.domain.sa/",
                "unit_cost": 9.5,
                "quantity": 1,
                "net_total": 9.5,
                "discount_rate": 0,
                "discount_amount": 0,
                "tax_rate": 0,
                "tax_total": 0,
                "total": 9.5
            }
        ]
    }
}
{
    "bulk_email": [
        {
            "address": "[email protected]"
        },
        {
            "address": "[email protected]"
        }
    ],
    "bulk_sms": [
            {
                "numberRequested": "+201111111211",
                "sentTo": "+20 111 111 1211"
            }
        ],
    "invoice_id": 2775626,
    "invoice_link": "https://secure-egypt.PayTabs.com/payment/request/invoice/2775626/40EAF5A43CB745B2B5C58410D4192321"
}
Expected Payment Flow Behavior
- Invoices
- As mentioned above in the How to use? section, As a merchant you would initiate a payment request per the above Specifications, same as the sample codes mentioned in the samples section above.
- Then, you will receive a response that includes either a redirect URL, or an invoice link (depending on how you initiated it. To know more about different ways you mayclick here).
This means you have initiated a correct invoice payment request successfully."redirect_url": "https://secure.paytabs.com/payment/page/599458B182E5B6B********************B4818688","invoice_link": "https://secure.paytabs.com/payment/request/invoice/2072841/A8CB***************B763A", - Once you received the above URL the provided recipient/s would receive as well the notifications accordingly depending on the type of notification you passed.
- In the meantime, your invoice would be already created on your dashboard, which you can access from your merchant dashboard.

- Next, you should redirect your customer to this URL so the payment process can be finalized.
- After this, your customer would proceed normally with payment by providing his card information.
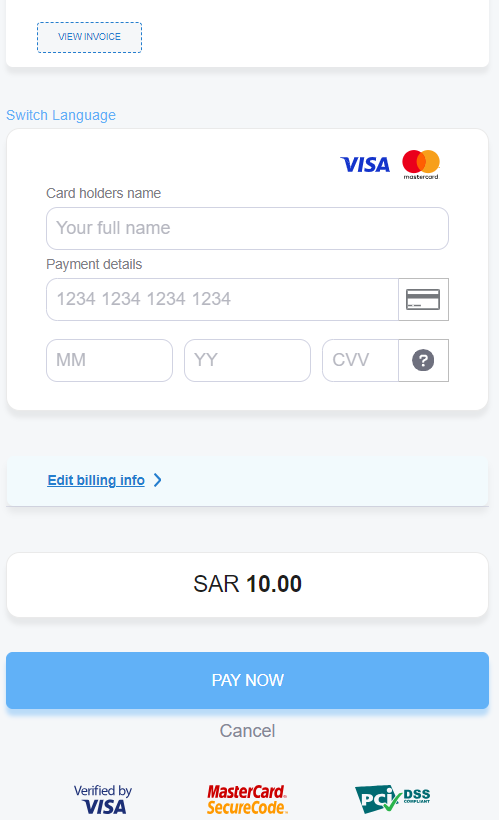
- Then, he will be redirected to his issuer bank 3DS/OTP page to authenticate the used card
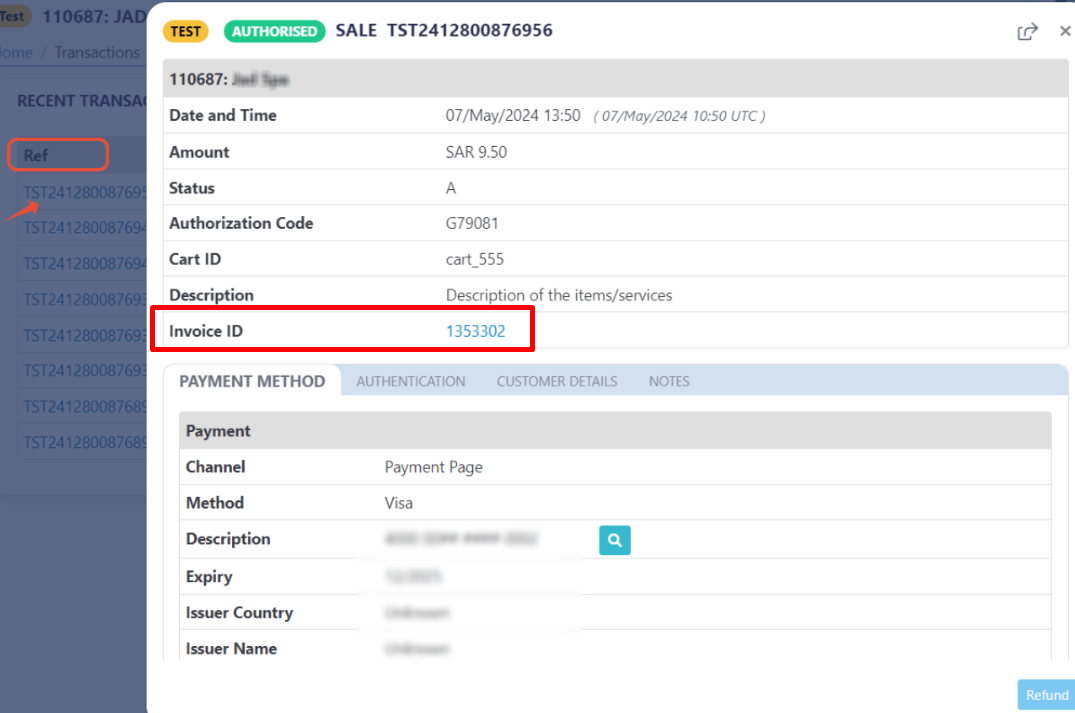
- Finally, he would be redirect to a success/error page accordingly. By this time, you will be able to see his transaction on your merchant dashboard, whether it's accepted/authorized or not. Only successful payments will be connected to the invoice itself in the invoice record.

After Creating the Invoice
After Creating the Invoice
In the realm of making your digital transactions more easier and smoother, PayTabs offers robust solutions for sending your invoices via the Invoices APIs. This section delves into two specific methods: sending invoices via SMS endpoint.
By leveraging these API parameter, businesses can streamline their invoicing processes, ensuring timely and efficient payment requests.
This endpoint is used to send automated notifications to customers after an invoice is generated. This ensures that customers are promptly informed about their invoices, which can help in speeding up the payment process and improving customer satisfaction.
The Endpoint and Related Postman Collection
In this section, we will rely on the PayTabs Invoice Payment Page API Endpoint, mentioned on PayTabs API endpoints postman collection, which you can access from PayTabs Postman APIs Collection. The endpoint will need to be accessed with a POST request on the below-mentioned URL
| POST | {{domain}}/payment/invoice/{{invoice_id}}/sms |
|---|
Please note that not using the proper endpoint URL {domain} will lead to authentication issues within your responses. To find the your proper domain you can read ourWhat is my (Region)/(endpoint URL)?tutorial article.
- KSA
- UAE
- Egypt
- Oman
- Jordan
- Kuwait
- Global
https://secure.paytabs.sa/payment/invoice/{{invoice_id}}/sms
https://secure.paytabs.com/payment/invoice/{{invoice_id}}/sms
https://secure-egypt.paytabs.com/payment/invoice/{{invoice_id}}/sms
https://secure-oman.paytabs.com/payment/invoice/{{invoice_id}}/sms
https://secure-jordan.paytabs.com/payment/invoice/{{invoice_id}}/sms
https://secure-kuwait.paytabs.com/payment/invoice/{{invoice_id}}/sms
https://secure-global.paytabs.com/payment/invoice/{{invoice_id}}/sms
Request Parameters
- The Minimum Required Parameters
To send an SMS using this integration type, there are minimum required parameters that need to be passed with valid information. The specification of these required parameters is clarified below:
| URI Param | Data Type | Value | Required |
|---|---|---|---|
| INT | Accept only valid invoice number | ✔ |
| |||
| Parameter | Data Type | Min | Max | Required |
|---|---|---|---|---|
| INT | Accept only valid profile number | ✔ | |
| The merchant Profile ID you can get from your PayTabs dashboard. For more information please check ourHow to get your account information from PT2 Dashboard?tutorial article. To know more about this parameter pleaseclick here | ||||
| ||||
| STRING | Valid number + country code prefix | ✔ | |
| Indicates the customer's valid phone number. For more information please check our. To know more about this parameter pleaseclick here. | ||||
| ||||
Request & Response Payload Samples
- Required Parameters Sample Payloads
The below sample request payload will show you how you can pass the above-mentioned required parameters, which are needed to be passed with valid values to perform a request. Along with the response payload received after using this request payload.
- Sample Request Payload
- Sample Response Payload
{
     curl --location -g --request POST 'https://secure.paytabs.com/payment/invoice/2080263/sms' \
     --header 'authorization: SBJNXXX2GJ-J26LHXXXLH-6TMXXXL9WM' \
     --header 'Content-Type: application/json' \
}
{
     "profile_id":{{profile_id}},
     "customer_details" : {
     "phone":"+966522222222"
    }
}
{
    "message": "Invoice No. 2080263 sent to phone: +966522222222"
}
The Payment Flow Experience
Reaching this point, you are now able to initiate an Invoice API request and sending it as SMS. The process involves several key steps that ensure a smooth payment and tracking experience for both you and customers. Here’s how it works:
-
Initiating the Request: Once you initiate an invoice request, you will receive a response that includes either a redirect URL, or an invoice link (depending on how you initiated it. To know moreclick here). This URL is crucial for guiding your customer through the payment process.
"redirect_url": "https://secure.paytabs.com/payment/page/59946B********************B4817FD4488","invoice_link": "https://secure.paytabs.com/payment/request/invoice/2072841/A8CB**************868206DB76382A"
- Once you received the above URL. You will need to use this endpoint as clarified in the above sections, in order for the provided recipient to receive the SMS notification.
- In the meantime, your invoice would be already created on your dashboard, which you can access from your merchant dashboard.
-
Next, you should redirect your customer to this URL so the payment process can be finalized.
-
After this, your customer would proceed normally with payment by providing his card information.
- Then, he will be redirected to his issuer bank 3DS/OTP page to authenticate the used card
- Finally, he would be redirect to a success/error page accordingly. By this time, you will be able to see his transaction on your merchant dashboard, whether it's accepted/authorized or not. Only successful payments will be connected to the invoice itself in the invoice record.