Step 3 - Initiating the payment
PayTabs Mobile SDKs streamline the integration process with the PayTabs payment gateway by offering a pre-configured payment interface. This interface efficiently manages card data entry, billing and shipping information, and automatically supplements any missing details required to complete the transaction flow.
This article is dedicated to walking you through how to initiate the payment request payload using the configuration options and parameters that have already been clarified in the previous step, "Step 2 - Configure the integration method".
Then after that, you can easily initiate your payment using one of the following categories supported in this Native iOS SDK as listed below:
Which you will need first to be aware of how to Manage Shipping and Billing details among any of the above categories:
Mobile SDKs Workflow
This Diagram outlines the simplified workflow of the PayTabs Mobile SDK integration, illustrating the sequence of interactions between the key components involved in a mobile payment transaction. The diagram provides a clear and concise representation of the communication flow between the Customer, Mobile Application, PayTabs SDK, PayTabs Gateway, and the Merchant Server.
This will assist you understanding the operational logic and integration touchpoints required to implement a seamless payment experience using the PayTabs Mobile SDK. It highlights the initialization process, user interaction with the payment interface, transaction processing, and post-payment IPN/Callback handling for order status updates.
By following this workflow, merchants can ensure secure, efficient, and user-friendly payment processing within their mobile applications.
Manage Shipping and Billing details
You will first need to be aware of how to Manage Shipping and Billing details among any of the following payment initiations:
- Show Billing/Shipping Information Section
- Force Shipping Information Validation
- Link billing name with the cardholder name
Show Billing/Shipping Information Section
These are boolean parameters that indicate whether to hide billing/shipping information or not from the payment form screen.
Note that the customer details are still required and MUST be passed. In case any of the details are missing or passed with invalid values, the request will fail, and the SDK will throw an exception.
By default, the billing and shipping info section is disappeared, sets its flag to true to let the SDK internally handle the missing billing & shipping info.
configuration.showBillingInfo = true
configuration.showShippingInfo = true
Force Shipping Information Validation
This is a boolean parameter that indicates whether to force the customer to provide the shipping information or not.
By default, the validation on shipping info is disabled.
You can set it while you build the configuration as shown below:
configuration.forceShippingInfo = true
Link billing name with the cardholder name
A boolean parameter that Indicates whether to add the billing name to be the same as the cardholder's name or not.
By default, the billing name is linked with card holder name, if you set its flag to false the billing name and the card holder name will be seperated
configuration.linkBillingNameWithCard = true
Pay with Card
Implementing this option will enable you to initiate payments targeted to be paid using the supported types of credit cards configured in your profile. You will have the ability to perform a card payment in one of the below ways/options:
Payment With Card
To learn how to set up payment with card, please click here to review the steps.
Payment With Card
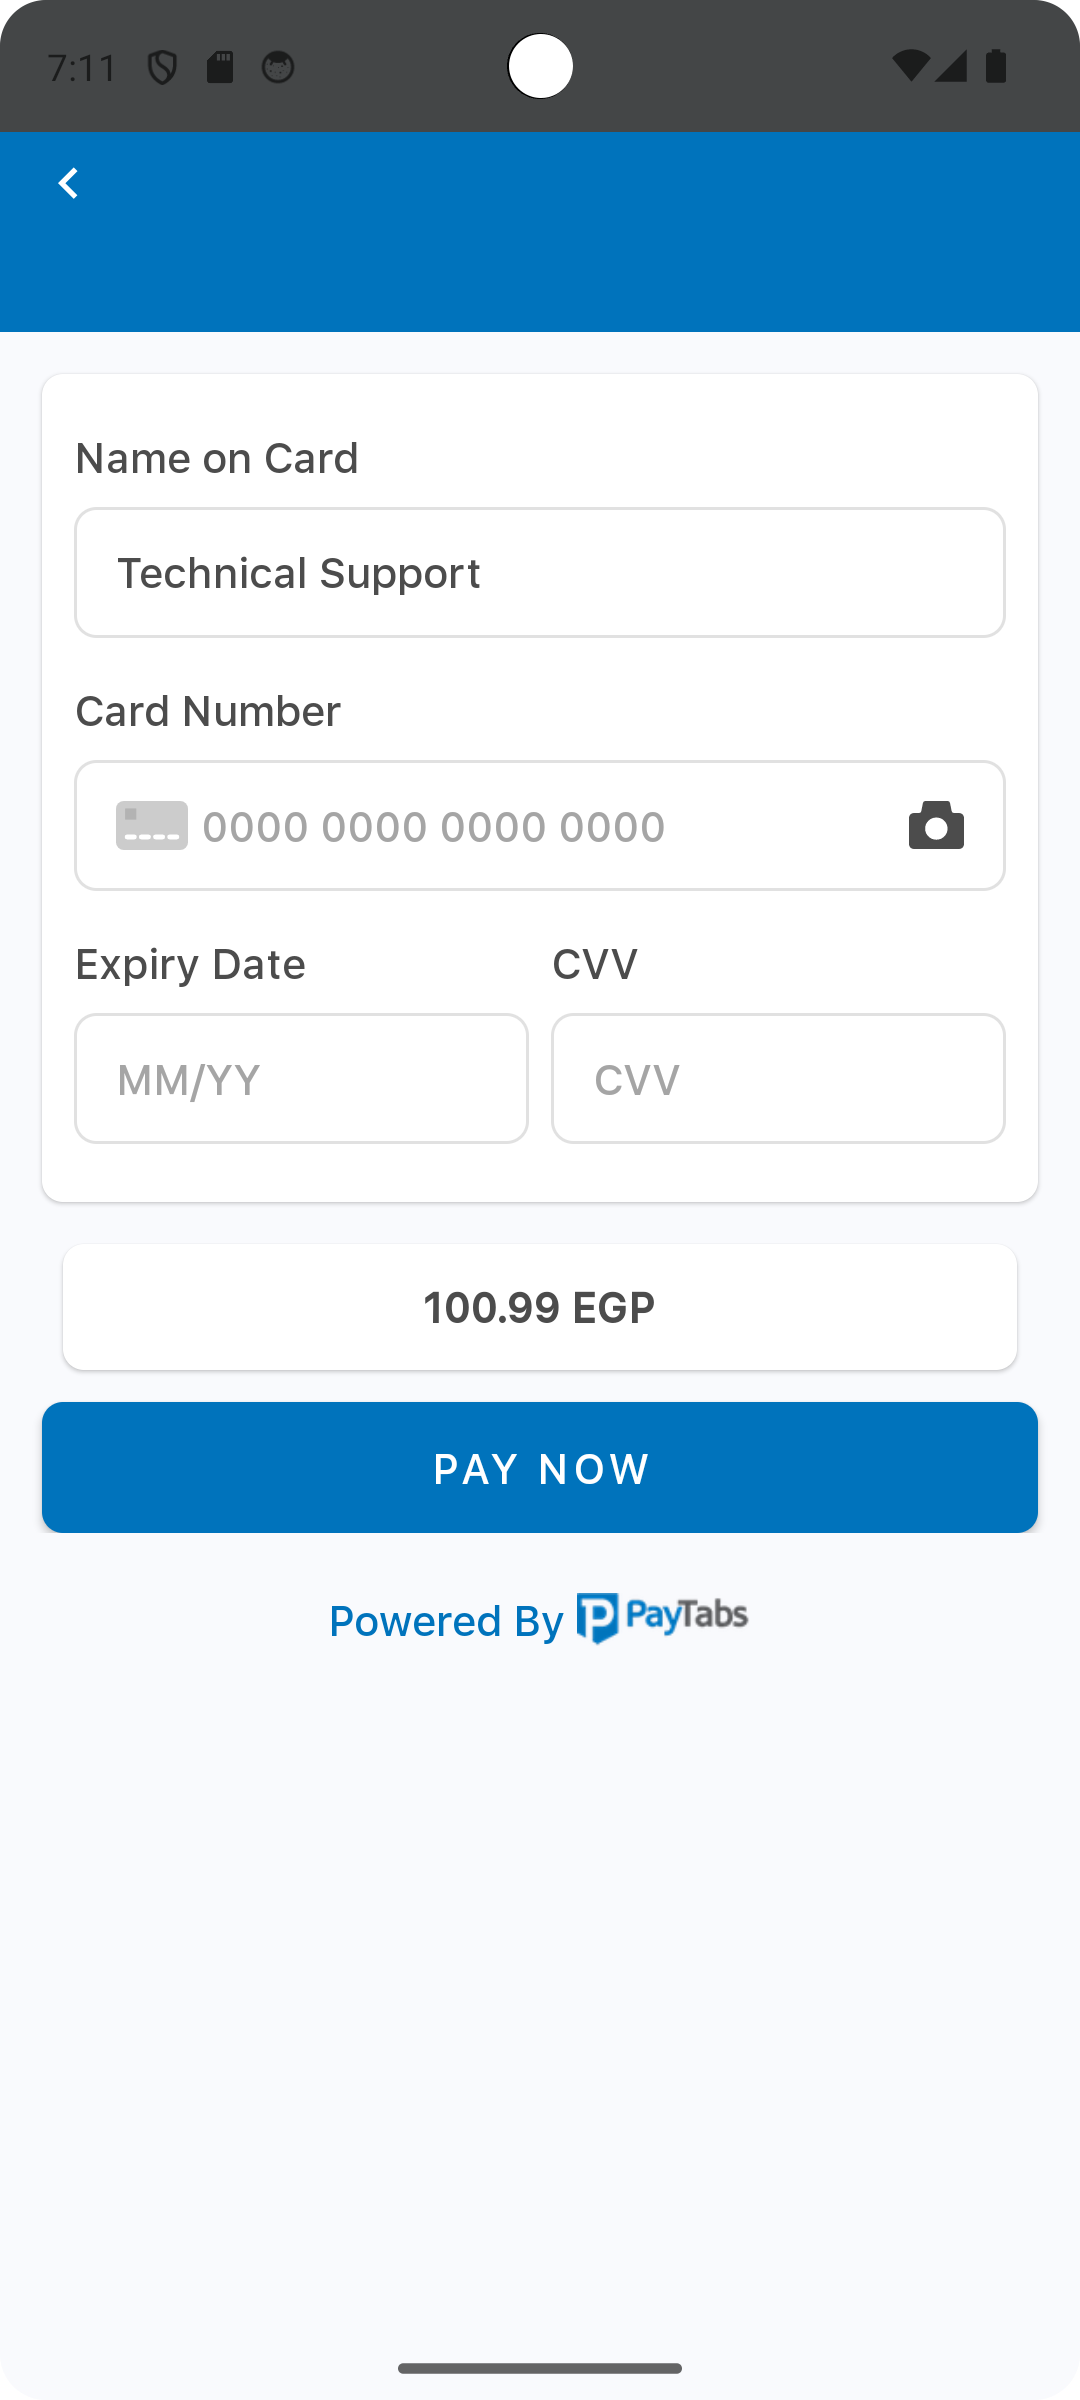
Implementing this option will enable you to initiate payments targeted to be paid using the supported types of credit cards such as Visa, MasterCard, Amex, etc. To be able to do this, please follow the below instructions:
Make sure you import the desire classes as mentioned above.
Configure the billing & shipping information for this payment, noting that the shipping information is optional. To know more about this, please check above Manage Shipping and Billing details and Configuration Options & Parameters manual.
let billingDetails = PaymentSDKBillingDetails(
    name: "Technical Support",
    email: "[email protected]",
    phone: "+966 55 xxxxxx6",
    addressLine: "address street",
    city: "Jeddah",
    state: "Makkah",
    countryCode: "SA", // ISO alpha 2
    zip: "24211")

let shippingDetails = PaymentSDKShippingDetails(
    name: "Technical Support",
    email: "[email protected]",
    phone: "+966 55 xxxxxx6",
    addressLine: "address street",
    city: "Jeddah",
    state: "Makkah",
    countryCode: "SA", // ISO alpha 2
    zip: "24211")
Then create an object from the PaymentSDKConfiguration and fill it out with your credentials and payment details . To know more about what is the exact values that should be passed here, please check the SDK Configuration Options & Parameters manual.
let configuration = PaymentSDKConfiguration(
  profileID: profileID,
  serverKey: serverKey,
  clientKey: clientKey,
  currency: "SAR",
  amount: 5.0,
  merchantCountryCode: "SA")
  .cartDescription(cartDesc)
  .cartID(cartId)
  .billingDetails(billingDetails)
Only then you will be ready to start/initiate the payment by passing your PaymentSDKConfiguration object to the startCardPayment function. To know more about this please check the SDK Configuration Options & Parameters manual and Step 5 - Native iOS SDK | Handle the payment response manaul.
PaymentManager.startCardPayment(
  on: self,
  configuration: configuration,
  delegate: self
)
This will make the payment behavior would be like the one below, in which your customers will have to provide their full card details.
Tokenized Card Payment (Recurring)
To learn how to set up recurring payment, please click here to review the steps.
Tokenized Card Payment (Recurring)
To enable tokenization (for recurring or any other services that depend on auto-detection from the customers instead of saving credit card details), please follow the below instructions:
Request a token in creating any payment request by passing the
tokeniseTypealong with thetokenFormatwith the preferred type and format that suits your business needs within your PaymentSDKConfiguration, as shown below.configuration.tokeniseType = .userOptinoal
configuration.tokenFormat = .hex32Be AwareTo know more about these parameters and what are the available values you can pass please check the "2.3 Native Android SDK | Enums" manual.Configure the billing & shipping information for this payment, noting that the shipping information is optional. To know more about this, please check above Manage Shipping and Billing details and Configuration Options & Parameters manual.
let billingDetails = PaymentSDKBillingDetails(
name: "Technical Support",
email: "[email protected]",
phone: "+966 55 xxxxxx6",
addressLine: "address street",
city: "Jeddah",
state: "Makkah",
countryCode: "SA", // ISO alpha 2
zip: "24211")
let shippingDetails = PaymentSDKShippingDetails(
name: "Technical Support",
email: "[email protected]",
phone: "+966 55 xxxxxx6",
addressLine: "address street",
city: "Jeddah",
state: "Makkah",
countryCode: "SA", // ISO alpha 2
zip: "24211")Then create an object from the PaymentSDKConfiguration and fill it out with your credentials and payment details don't forget to set "tokeniseType", and "tokenFormat". To know more about what is the exact values that should be passed here, please check the SDK Configuration Options & Parameters manual.
let configuration = PaymentSDKConfiguration(
profileID: profileID,
serverKey: serverKey,
clientKey: clientKey,
currency: "SAR",
amount: 5.0,
merchantCountryCode: "SA")
.cartDescription(cartDesc)
.cartID(cartId)
.billingDetails(billingDetails)
configuration.tokeniseType = .userOptinoal
configuration.tokenFormat = .hex32Only then you will be ready to start/initiate the payment by passing your PaymentSDKConfiguration object to the startCardPayment function. To know more about this please check the SDK Configuration Options & Parameters manual and Step 5 - Native iOS SDK | Handle the payment response manaul.
PaymentManager.startCardPayment(
on: self,
configuration: configuration,
delegate: self
)This will make the payment behavior would be like the one below, in which your customers will have to provide their full card details.
After the customer complete a successful authorized payment, you will receive the
tokenalong with thetransaction reference(that generated this token) within your interface/class in which you handled the payment response. You will need to save them for future usage.Then perform any further recurring transaction according to your business needs by repeating steps 2, 3, and 4 from this order steps, then directly start the tokenized card payment via the startTokenizedCardPayment function by passing the PaymentSDKConfiguration object along with the
tokenand thetransaction reference(saved from the previous step).PaymentManager.startTokenizedCardPayment(
on: self,
configuration: configuration,
token: *token*,
transactionRef: *transactionReference*
delegate: self
)
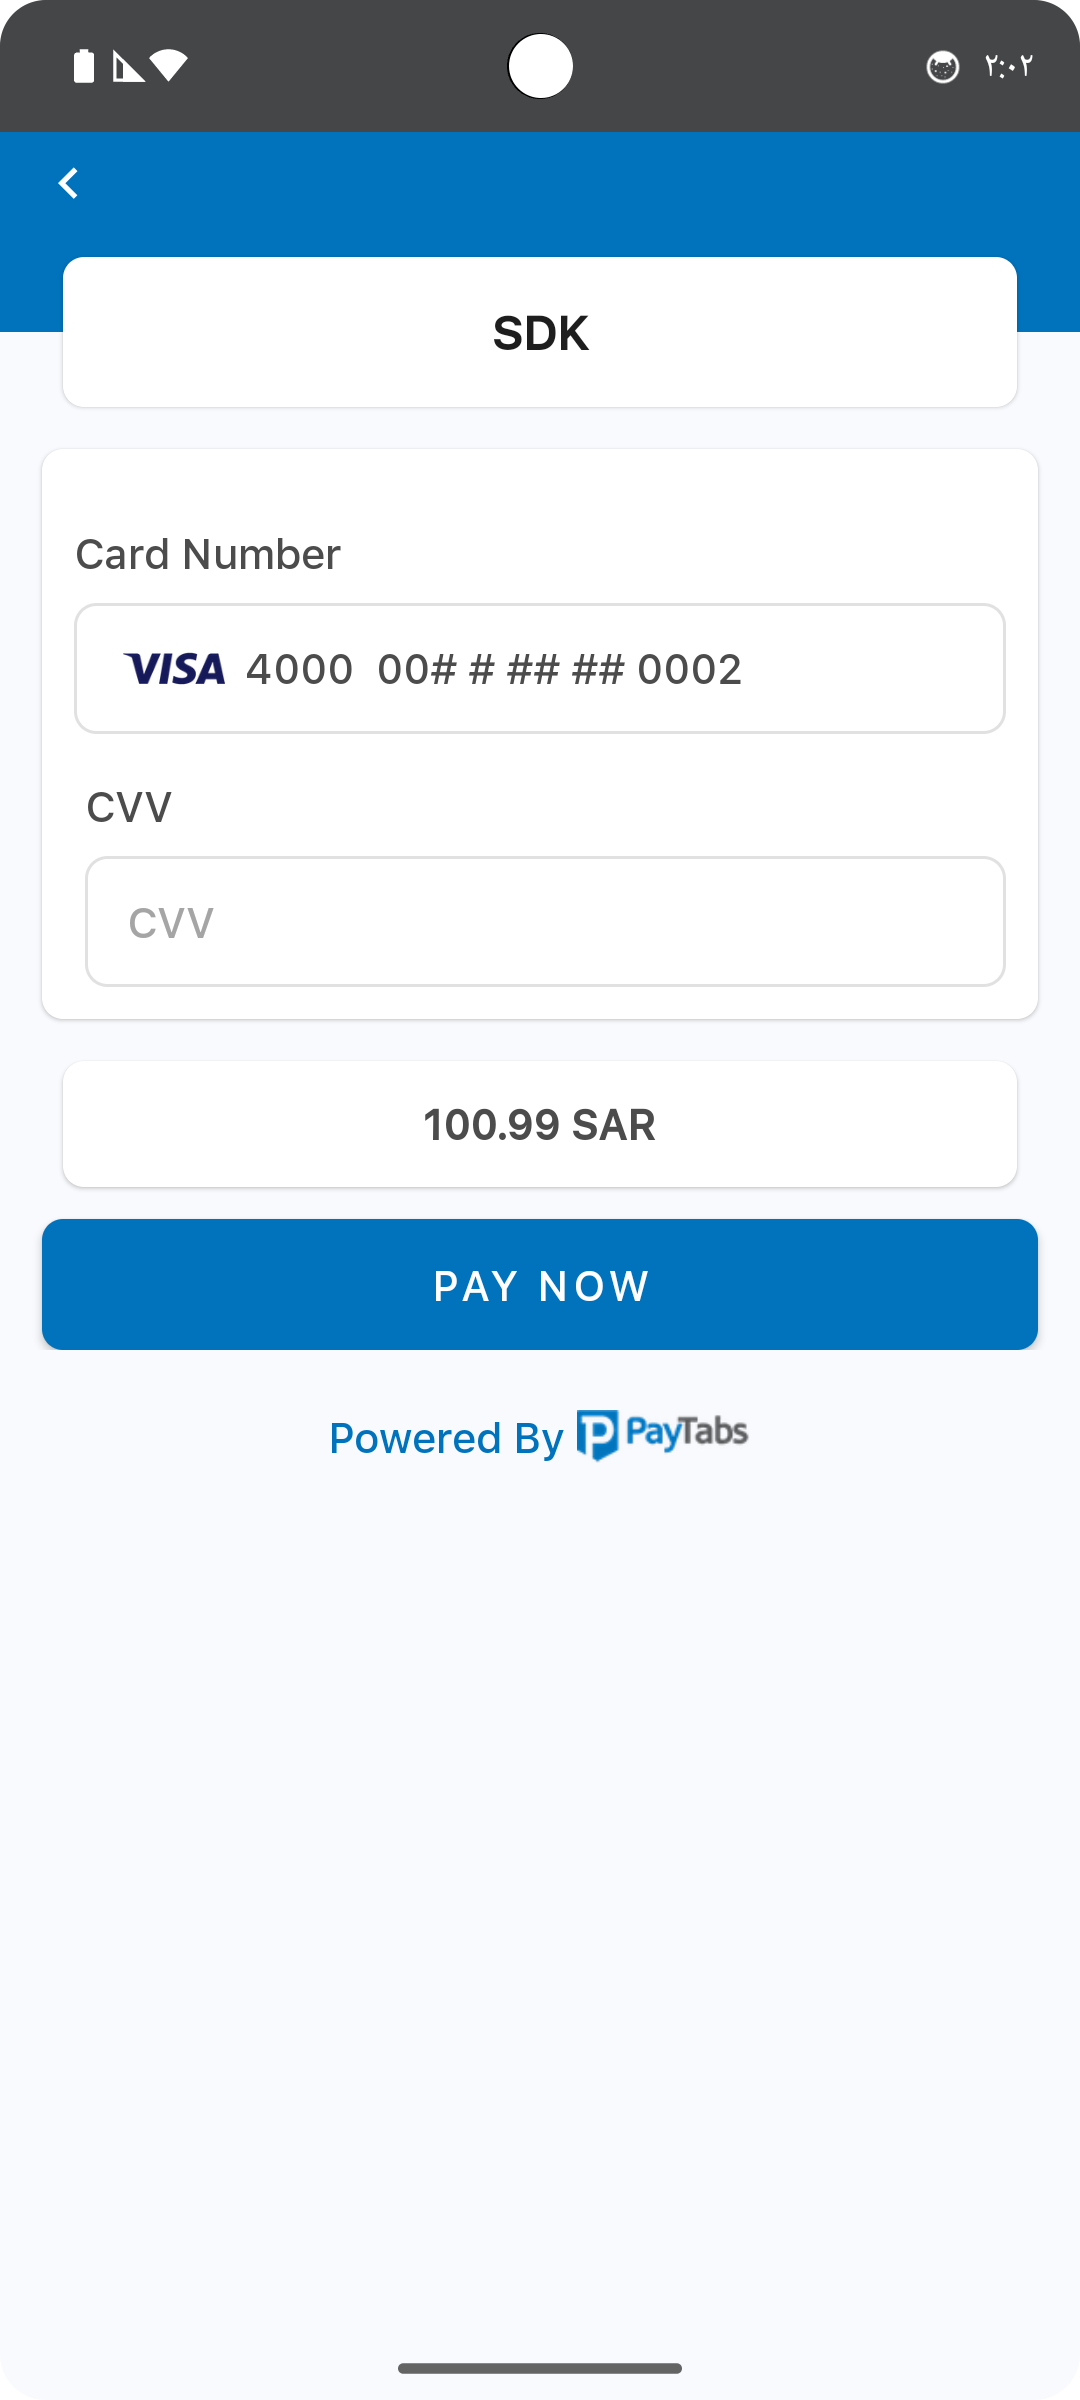
Tokenized Card Payments (Requiring a CVV)
To learn how to set up payment with only requiring a CVV, please click here to review the steps.
Tokenized Card Payments (Requiring a CVV)
To enable tokenization (for recurring or any other services that depend on auto-detection from the customers instead of saving credit card details), please follow the below instructions:
Request a token in creating any payment request by passing the
tokeniseTypealong with thetokenFormatwith the preferred type and format that suits your business needs within your PaymentSDKConfiguration, as shown below.configuration.tokeniseType = .userOptinoal
configuration.tokenFormat = .hex32Be AwareTo know more about these parameters and what are the available values you can pass please check the "2.3 Native iOS SDK | Enums" manual.Configure the billing & shipping information for this payment, noting that the shipping information is optional. To know more about this, please check above Manage Shipping and Billing details and Configuration Options & Parameters manual.
let billingDetails = PaymentSDKBillingDetails(
    name: "Technical Support",
    email: "[email protected]",
    phone: "+966 55 xxxxxx6",
    addressLine: "address street",
    city: "Jeddah",
    state: "Makkah",
    countryCode: "SA", // ISO alpha 2
    zip: "24211")

let shippingDetails = PaymentSDKShippingDetails(
    name: "Technical Support",
    email: "[email protected]",
    phone: "+966 55 xxxxxx6",
    addressLine: "address street",
    city: "Jeddah",
    state: "Makkah",
    countryCode: "SA", // ISO alpha 2
    zip: "24211")
Then create an object from the PaymentSDKConfiguration and fill it out with your credentials and payment details don't forget to set "tokeniseType", and "tokenFormat". To know more about what is the exact values that should be passed here, please check the SDK Configuration Options & Parameters manual.
let configuration = PaymentSDKConfiguration(
  profileID: profileID,
  serverKey: serverKey,
  clientKey: clientKey,
  currency: "SAR",
  amount: 5.0,
  merchantCountryCode: "SA")
  .cartDescription(cartDesc)
  .cartID(cartId)
  .billingDetails(billingDetails)

configuration.tokeniseType = .userOptinoal
configuration.tokenFormat = .hex32
Only then you will be ready to start/initiate the payment by passing your PaymentSDKConfiguration object to the startCardPayment function. To know more about this please check the SDK Configuration Options & Parameters manual and Step 5 - Native iOS SDK | Handle the payment response manaul.
PaymentManager.startCardPayment(
  on: self,
  configuration: configuration,
  delegate: self
)
This will make the payment behavior would be like the one below, in which your customers will have to provide their full card details.
After the customer complete a successful authorized payment, you will receive the
tokenalong with thetransaction reference(that generated this token) within your interface/class in which you handled the payment response. You will need to save them for future usage.Then perform any further recurring (Requiring a CVV) transaction according to your business needs by repeating steps 2, 3, and 4 from this order steps, then you have the option to start the tokenized card payment via the start3DSecureTokenizedCardPayment function by passing the PaymentSDKConfiguration object along with the
tokenand the PaymentSDKSavedCardInfo, which includes themasked cardand thecard type(saved from the previous step).// Masked Card Number, could be found within the paymentInfo object under the paymentDescription parameter
// For Example "4111 11## #### 1111"
// Card Schema, could be found within the paymentInfo object under the cardScheme parameter
// For example "Visa"
PaymentManager.start3DSecureTokenizedCardPayment(
on: self,
configuration: configuration,
savedCardInfo: PaymentSDKSavedCardInfo(Masked_card, "Visa or MC or card type"),
token: *TOKEN*
delegate: self
)This will make the payment behavior would be like the one below, in which your customers will have to provide only their CVVs instead of the whole card details:
Payment With ApplePay
Implementing this option will enable you to initiate payments targeted to be paid using the supported types of credit cards such as Visa, MasterCard, Amex, etc. To be able to do this, please follow the below instructions:
- First, start by following the guide steps to configure ApplePay, to know how you can configure ApplePay certificate with PayTabs.
Make sure you import the desire classes as mentioned above.
Configure the billing & shipping information for this payment, noting that the shipping information is optional. To know more about this, please check above Manage Shipping and Billing details and Configuration Options & Parameters manual.
let billingDetails = PaymentSDKBillingDetails(
    name: "Technical Support",
    email: "[email protected]",
    phone: "+966 55 xxxxxx6",
    addressLine: "address street",
    city: "Jeddah",
    state: "Makkah",
    countryCode: "SA", // ISO alpha 2
    zip: "24211")

let shippingDetails = PaymentSDKShippingDetails(
    name: "Technical Support",
    email: "[email protected]",
    phone: "+966 55 xxxxxx6",
    addressLine: "address street",
    city: "Jeddah",
    state: "Makkah",
    countryCode: "SA", // ISO alpha 2
    zip: "24211")
Then create an object from the PaymentSDKConfiguration and fill it out with your credentials and payment details . To know more about what is the exact values that should be passed here, please check the SDK Configuration Options & Parameters manual.
let configuration = PaymentSDKConfiguration(
profileID: profileID,
serverKey: serverKey,
clientKey: clientKey,
currency: "SAR",
amount: 5.0,
merchantCountryCode: "SA")
.cartDescription(cartDesc)
.cartID(cartId)
.billingDetails(billingDetails)Only then you will be ready to start/initiate the payment by passing your PaymentSDKConfiguration object along with and the token you got from the SamsungPay integration guide in step 1 in this manual to the startApplePayPayment function. To know more about this please check the SDK Configuration Options & Parameters manual and Step 5 - Native iOS SDK | Handle the payment response manaul.
PaymentManager.startApplePayPayment(
on: self,
configuration: configuration,
delegate: self
)
Pay with Alternative Payment Methods (APMs)
Implementing this option will enable you to initiate payments targeted to be paid using the supported types of credit cards such as Visa, MasterCard, Amex, etc. To be able to do this, please follow the below instructions:
Make sure you import the desire classes as mentioned above.
Configure the billing & shipping information for this payment, noting that the shipping information is optional. To know more about this, please check above Manage Shipping and Billing details and Configuration Options & Parameters manual.
let billingDetails = PaymentSDKBillingDetails(
    name: "Technical Support",
    email: "[email protected]",
    phone: "+966 55 xxxxxx6",
    addressLine: "address street",
    city: "Jeddah",
    state: "Makkah",
    countryCode: "SA", // ISO alpha 2
    zip: "24211")

let shippingDetails = PaymentSDKShippingDetails(
    name: "Technical Support",
    email: "[email protected]",
    phone: "+966 55 xxxxxx6",
    addressLine: "address street",
    city: "Jeddah",
    state: "Makkah",
    countryCode: "SA", // ISO alpha 2
    zip: "24211")
Then create an object from the PaymentSDKConfiguration and fill it out with your credentials and payment details . To know more about what is the exact values that should be passed here, please check the SDK Configuration Options & Parameters manual.
let configuration = PaymentSDKConfiguration(
  profileID: profileID,
  serverKey: serverKey,
  clientKey: clientKey,
  currency: "SAR",
  amount: 5.0,
  merchantCountryCode: "SA")
  .cartDescription(cartDesc)
  .cartID(cartId)
  .billingDetails(billingDetails)
Only then you will be ready to start/initiate the payment by passing your PaymentSDKConfiguration object to the startAlternativePaymentMethod function. To know more about this please check the SDK Configuration Options & Parameters manual and Step 5 - Native iOS SDK | Handle the payment response manaul.
PaymentManager.startAlternativePaymentMethod(
  on: self,
  configuration: configuration,
  delegate: self
)