Initiating The Payment
Managed Form integration type is suitable for merchants with SAQ A-EP level. To know more about the Hosted Payment Page PCI DSS merchant requirements, please check this article .
In this manual, we will walk you through how to initiate a payment request via this integration type. You will be introduced to the required parameters that need to be passed to initiate the request, along with all the possible optional parameters as well. We highly recommend that you and your team check the "Payment Workflow" solution article first to understand the business/logic this configuration option relay on.
Using Managed Form. your website will display its own card entry form. However, key fields will be managed by the PayTabs gateway. You will need to include a script that replaces the sensitive card data with a payment token. Hence, there are two main parts to initiating the payment
The Usage
The Frontend Side
The Frontend Side
Frontend Request Requirements
These are the requirement required from the website (The origin requester) using the managed form:
- Should be a valid passable URL
- Should be an HTTPS scheme
- The hostname should contain a domain that has at least one dot in it (so not localhost)
- Should not contain ".." or "/"
- Should not be any path component
Not fulfilling the above requirements may result facing the error 'Access to XMLHttpRequest has been blocked by CORS policy'
Implementing the Payment Form
Most probably, you will have a payment form that looks like the following form, which we will use for the purpose of this manual.
<form action="https://yourserver.com/payment" id="payform" method="post">
  <span id="paymentErrors"></span>
  <div class="row">
      <label>Card Number</label>
      <input type="text" name="number" size="20">
  </div>
  <div class="row">
      <label>Expiry Date (MM/YYYY)</label>
      <input type="text" name="expmonth" size="2">
      <input type="text" name="expyear" size="4">
  </div>
  <div class="row">
      <label>Security Code</label>
      <input type="text" name="cvv" size="4">
  </div>
  <input type="submit" value="Place order">
</form>
To modify this typical payment form to one that uses the PayTabs managed form, there are three simple steps:
- Include the paylib.js library within the page.
| POST | {{domain}}/payment/js/paylib.js |
|---|
Please note that not using the proper endpoint URL {domain} will lead to authentication issues within your responses. To find the your proper domain you can read ourWhat is my (Region)/(endpoint URL)?tutorial article.
- KSA
- UAE
- Egypt
- Oman
- Jordan
- Kuwait
- Iraq
- Morocco
- Qatar
- Global
https://secure.paytabs.sa/payment/js/paylib.js
https://secure.paytabs.com/payment/js/paylib.js
https://secure-egypt.paytabs.com/payment/js/paylib.js
https://secure-oman.paytabs.com/payment/js/paylib.js
https://secure-jordan.paytabs.com/payment/js/paylib.js
https://secure-kuwait.paytabs.com/payment/js/paylib.js
https://secure-iraq.paytabs.com/payment/js/paylib.js
https://secure-morocco.paytabs.com/payment/js/paylib.js
https://secure-doha.paytabs.com/payment/js/paylib.js
https://secure-global.paytabs.com/payment/js/paylib.js
<script src="https://secure.paytabs.com/payment/js/paylib.js"></script>

<form action="https://yourserver.com/payment" id="payform" method="post">
  <span id="paymentErrors"></span>
  <div class="row">
      <label>Card Number</label>
      <input type="text" name="number" size="20">
  </div>
  <div class="row">
      <label>Expiry Date (MM/YYYY)</label>
      <input type="text" name="expmonth" size="2">
      <input type="text" name="expyear" size="4">
  </div>
  <div class="row">
      <label>Security Code</label>
      <input type="text" name="cvv" size="4">
  </div>
  <input type="submit" value="Place order">
</form>
- Change the input fields for the sensitive card data to use 'data-paylib' instead of 'name'.
By removing the name from fields holding sensitive card data (card number, expiry data and security code) it means they will NOT be submitted to your server. Instead they must have a 'data-paylib' attribute, which allows the PayTabs systems to identify and manage them.
<script src="https://secure.paytabs.com/payment/js/paylib.js"></script>

<form action="https://yourserver.com/payment" id="payform" method="post">
<span id="paymentErrors"></span>
<div class="row">
  <label>Card Number</label>
  <input type="text" data-paylib="number" size="20">
</div>
<div class="row">
  <label>Expiry Date (MM/YYYY)</label>
  <input type="text" data-paylib="expmonth" size="2">
  <input type="text" data-paylib="expyear" size="4">
</div>
<div class="row">
  <label>Security Code</label>
  <input type="text" data-paylib="cvv" size="4">
</div>
<input type="submit" value="Place order">
</form>
- Attach the paylib.js library to the form. You will need your client key as part of this.
To get your client key check the article How to get my Authentication/Integration/API Key
<script src="https://secure.paytabs.com/payment/js/paylib.js"></script>

<form action="https://yourserver.com/payment" id="payform" method="post">
<span id="paymentErrors"></span>
<div class="row">
  <label>Card Number</label>
  <input type="text" data-paylib="number" size="20">
</div>
<div class="row">
  <label>Expiry Date (MM/YYYY)</label>
  <input type="text" data-paylib="expmonth" size="2">
  <input type="text" data-paylib="expyear" size="4">
</div>
<div class="row">
  <label>Security Code</label>
  <input type="text" data-paylib="cvv" size="4">
</div>
<input type="submit" value="Place order">
</form>

<script type="text/javascript">
var myform = document.getElementById('payform');
paylib.inlineForm({
'key': 'CP****-****6M-6V****-****NM',
'form': myform,
'autoSubmit': true,
'callback': function(response) {
  document.getElementById('paymentErrors').innerHTML = '';
  if (response.error) {
    paylib.handleError(document.getElementById('paymentErrors'), response);
  }
}
});
</script>
When the form is submitted, paylib.js first sends the card details to the PayTabs server for storage and to create a temporary payment token. This token is then inserted into the form data before it is submitted to your server.
Your server will not receive the sensitive card details, these will be removed from the form.
At the end of these steps, your server would receive a "token", which would be a part of the initiate the request that would be sent from your server side to PayTabs, which would be used in the next step.
The Backend Side
The Backend Side
The Endpoint and Related Postman Collection
In this tutorial, we will rely on the PayTabs Hosted Payment Page API Endpoint, mentioned on PayTabs API endpoints postman collection, which you can access from PayTabs Postman APIs Collection. The endpoint will need to be accessed with a POST request on the below-mentioned URL
| POST | {{domain}}/payment/request |
|---|
Please note that not using the proper endpoint URL {domain} will lead to authentication issues within your responses. To find the your proper domain you can read ourWhat is my (Region)/(endpoint URL)?tutorial article.
- KSA
- UAE
- Egypt
- Oman
- Jordan
- Kuwait
- Iraq
- Morocco
- Qatar
- Global
https://secure.paytabs.sa/payment/request
https://secure.paytabs.com/payment/request
https://secure-egypt.paytabs.com/payment/request
https://secure-oman.paytabs.com/payment/request
https://secure-jordan.paytabs.com/payment/request
https://secure-kuwait.paytabs.com/payment/request
https://secure-iraq.paytabs.com/payment/request
https://secure-morocco.paytabs.com/payment/request
https://secure-doha.paytabs.com/payment/request
https://secure-global.paytabs.com/payment/request
Request Parameters
To initiate a payment request using this integration type, there are minimum required parameters that need to be passed with valid information. The specification of these required parameters is clarified below:
- The Minimum Required Parameters
- The Available Optional Parameters
| Parameter | Data Type | Min | Max | Required |
|---|---|---|---|---|
| INT STRING | Accept only valid profile number. | ✔ | |
| The merchant Profile ID you can get from your PayTabs dashboard. For more information please check our How to get your account information from PT Dashboard? solution article. To know more about this parameter please click here. | ||||
| ||||
| STRING | Valid string from this enum list: sale auth void release capture refund register | ✔ | |
| The identification of the type of the transaction. To know more about these types please check our What is the "tran_type" (transaction type)? solution article. To know more about this parameter please click here. | ||||
| ||||
| STRING | Valid string from this list ecom recurring moto | ✔ | |
| The identification of the category/class this transaction will follow, such as eCommerce, Recurring, etc. To know more about these types please check our What is the "tran_class" (transaction class)? solution article. To know more about this parameter please click here. | ||||
| ||||
| STRING | 1 | 64 | ✔ |
| Indicates the cart/order id at the merchant end, to easily relate the PayTabs transaction to. To know more about this parameter please click here. | ||||
| ||||
| STRING | 1 | 128 | ✔ |
| Indicates the cart/order description at the merchant end, to easily relate the PayTabs transaction to. To know more about this parameter please click here. | ||||
| ||||
| STRING | 1 | 128 | ✔ |
| Indicates the transaction currency, which the customer will be charged with. To know more about this parameter please click here. | ||||
| ||||
| DECIMAL | 0.01 | 9999999999.99 | ✔ |
| Indicates the amount of the transaction the customer is about to be charged. Both min and max values are subjected to the merchant transaction limits. To know more about this parameter please click here. | ||||
| ||||
| OBJECT | ✔ | ||
| Indicates the customer details for this payment. If provided, the payment page will be prefilled with the provided data. To know more about this parameter please click here. | ||||
| ||||
| STRING | Valid Token that was generated earlier with a client end request using the paylib.js | ✔ | |
| The payment token is exclusively used with the Managed-Form integration type to create payment requests. | ||||
| ||||
| Parameter | Data Type | Min | Max | Required |
|---|---|---|---|---|
| STRING | N/A | 255 Characters (Valid URL) | ✘ |
| The return URL is the URL that PayTabs will redirect the customer to after he finishes the payment process (whether it's authenticated or not). It will redirect the customer with a POST response that is sent with the client/cardholder redirection through his browser containing the basic transaction information once the payment process ends (whether the customer cancels, paid, or failed to pay). It depends on the customer's actions, which means if the customer closes the browser right after the payment without waiting to be redirected back to your system, you will not receive this response. What is the Return URL vs the Callback URL? To know more about this parameter please click here. | ||||
| ||||
| STRING | N/A | 255 Characters (Valid URL) | ✘ |
| The callback response is a server-to-server POST response that is sent (to a pre-defined HTTPS URL) with the full detailed transaction information once the payment process has ended (whether the customer cancels, paid, or failed to pay). It does not depend on the customer's actions; the response will be sent anyway. What is the Return URL vs the Callback URL? To know more about this parameter please click here. | ||||
| ||||
| BOOLEAN | ✘ | ||
| Indicates whether to hide shipping and billing information or not from the payment page. Note: The customer details are still required and must be passed in case any of the details are missing or passed with invalid values; the hide_shipping option will be ignored, and the cardholder will be required to enter any of the missing details on the payment page. To know more about this parameter please click here. | ||||
| ||||
| OBJECT | ✘ | ||
| Indicates the customer shipping details for this payment. If provided, the payment page will be prefilled with the provided data.. | ||||
| ||||
| STRING | Either en or ar or fr | ✘ | |
| Indicates the payment page displaying language. To know more about this parameter please click here. | ||||
| ||||
| OBJECT | ✘ | ||
| For more customizations, you can pass to the Transaction API request your own "user-defined fields" up to 9 fields, and accordingly, you would receive those fields in the callback response. To know more about this parameter please click here. | ||||
| ||||
| STRING | Pass one of the following list:
| ✘ | |
| The tokenization format the generated token should follow. Token-Based Transactions. To know more about this parameter please click here. | ||||
| ||||
| BOOLEAN | ✘ | ||
| For showing the “save this card” option on the payment page. To know more about this parameter please click here. | ||||
| ||||
| STRING | Pass one or more of the following list: click here | ✘ | |
| To know more about this parameter please click here. | ||||
| ||||
| STRING | ✘ | ||
| token from previously tokenised transaction. To know more about this parameter please click here. | ||||
| ||||
| STRING | ✘ | ||
| Indicates the Transaction Reference on the PayTabs side check details on [Response Parameters | tran_ref] | ||||
| ||||
| OBJECT | ✘ | ||
| To provide more customization on token, and modify it if you don't like to use the default one | ||||
| ||||
| STRING | ✘ | ||
| this field detect shows which channel of integration/dashboard makes this transaction, this field will be returned in the IPN, callback and query transaction | ||||
| ||||
| OBJECT | ✘ | ||
| This object will contain 3Ds details of the card | ||||
| ||||
| STRING | ✘ | ||
| Trace code (trace) is the parameter that Indicates the code that PayTabs can trace this response with | ||||
| ||||
| STRING | ✘ | ||
| Trace code (trace) is the parameter that Indicates the code that PayTabs can trace this response with | ||||
| ||||
| INT | ✘ | ||
| Returned on error onlyThis parameter is error status code, that shows the code of the error and will be followed with message field that clarify the error | ||||
| ||||
| STRING | ✘ | ||
| Indicates the same as Transaction Reference on the PayTabs side check details on [Response Parameters | tran_ref], but it's used for forsa refund transactions | ||||
| ||||
| STRING | ✘ | ||
| it transaction reference related to forsa provider( payment method, it's differs from paytabs reference | ||||
| ||||
| STRING | ✘ | ||
| Indicates the same as Transaction Reference on the PayTabs side check details on [Response Parameters | tran_ref], but it's in the response of the refund of forsa #TODO#ADDFORSA ENDOINTHERE# | ||||
| ||||
| DECIMAL | 0.01 | 99999999.99 | ✘ |
| indicate the refunded amount from the normal detected transaction, means that you may partial refund not full | ||||
| ||||
| #boolean | ✘ | ||
| boolean field indicates if the refund is done or not | ||||
| ||||
| OBJECT | ✘ | ||
| Indicates the form of payment information in detail. | ||||
| ||||
| STRING | ✘ | ||
| Indicates whether a URL link of the payment page or the 3D Secure, where the customer need to redirect to complete the payment process. | ||||
| ||||
| OBJECT | ✘ | ||
| Indicates the merchant's ability to verify the customer's card BIN before proceeding with the transaction. | ||||
| ||||
Request & Response Payload Samples
The below sample request payload will show you how you can pass the above-mentioned parameters, which are needed to be passed with valid values to perform a request.
- Required Parameter sample Payloads
- Optional Parameter Sample Payloads
The below sample request payload will show you how you can pass the above-mentioned parameters, which are needed to be passed with valid values to perform a request.
- Sample Request Payload
- Sample Response Payload
{
    "profile_id": "987654",
    "tran_type": "sale",
    "tran_class": "ecom",
    "cart_id": "CART#1001",
    "cart_currency": "USD",
    "cart_amount": 500,
    "cart_description": "Description of the items/services",
    "customer_details":
    {
        "name": "Technical Support Team",
        "email": "[email protected]",
        "phone": "+201234567890",
        "street1": "address street",
        "city": "Cairo",
        "state": "CAI",
        "country": "EG",
        "zip": "45555",
        "ip": "1.1.1.1"
    },
    "payment_token": "Dh4r8Jwt7x6tPMVzKgtk"
}
Once the managed form request is validated and initiated, you will receive the following response, There are two scenarios that would change the workflow, as shown below:
- Via Non-3DSecure Cards
- Via 3DSecured Cards
If the card does NOT require 3DSecure authentication from the cardholder and issuer side, You will receive a response like the following:
{
    "tran_ref": "TST2233401397769",
    "tran_type": "Sale",
    "cart_id": "CART#1001",
    "cart_description": "Description of the items/services",
    "cart_currency": "USD",
    "cart_amount": "500.00",
    "tran_currency": "USD",
    "tran_total": "500.00",
    "return": "none",

    "customer_details": {
        "name": "Technical Support Team",
        "email": "[email protected]",
        "phone": "+201234567890",
        "street1": "address street",
        "city": "Cairo",
        "state": "C",
        "country": "EG",
        "zip": "45555",
        "ip": "1.1.1.1"
},
    "payment_result": {
    "response_status": "A",
    "response_code": "G17534",
    "response_message": "Authorised",
    "transaction_time": "2022-11-30T14:12:14Z"
},
    "payment_info": {
    "payment_method": "Visa",
    "card_type": "Credit",
    "card_scheme": "Visa",
    "payment_description": "4111 11## #### 1111",
    "expiryMonth": 12,
    "expiryYear": 2022
},
    "serviceId": 8,
    "profileId": 81784,
    "merchantId": 31237,
    "trace": "PMNT0403.638764BE.000037CC"
}
You can notice that the payment is already made, A transaction has been created, and you are already receiving the payment results, unlike the following scenario, since the issuer required no 3DSecure, the transaction had been created.
If the card does require the 3DSecure authentication from the cardholder and issuer side, You will receive a response like the following:
{
    "tran_ref": "TST2233401397780",
    "tran_type": "Sale",
    "cart_id": "CART#1001",
    "cart_description": "Description of the items/services",
    "cart_currency": "USD",
    "cart_amount": "500.00",
    "tran_currency": "USD",
    "tran_total": "500.00",
    "return": "none",
    "redirect_url": "https://secure-egypt.PayTabs.com/payment/page/5974A26182E411E56CCD5245D4EBC0787AF379E9E450E3D8B8E555CF/redirect",
    "customer_details": {
    "name": "Technical Support Team",
    "email": "[email protected]",
    "phone": "+201234567890",
    "street1": "address street",
    "city": "Cairo",
    "state": "C",
    "country": "EG",
    "zip": "45555",
    "ip": "1.1.1.1"
},
    "payment_info": {
    "payment_method": "Visa",
    "card_type": "Credit",
    "card_scheme": "Visa",
    "payment_description": "4000 00## #### 0002",
    "expiryMonth": 12,
    "expiryYear": 2022
},
    "serviceId": 8,
    "profileId": 81784,
    "merchantId": 31237,
    "trace": "PMNT0404.63876778.00003813"
}
Regarding Managed Form | Payment Workflow, by initiating the payment, and if the card is 3DSecured, you will receive the redirect URL (redirect_url) within the response. Use this URL to redirect your client browser to the issuer 3DSecure page.
Once the cardholder authenticates using the card (E.G., via OTP), the customer will be redirected back to the return page if it had been set or to the PayTabs default transaction result page if no return page was set. To check more about this, you can navigate to the return URL parameter manual.
Once the managed form request is validated and initiated, you will receive the following response, There are two scenarios that would change the workflow, as shown below:
- Sample Request Payload
- Sample Response Payload
{
    "profile_id": "987654",
    "tran_type": "sale",
    "tran_class": "ecom",
    "cart_id": "CART#1001",
    "cart_currency": "SAR",
    "cart_amount": 500,
    "cart_description": "Description of the items/services",
    "customer_details":
    {
        "name": "Technical Support Team",
        "email": "[email protected]",
        "phone": "+201234567890",
        "street1": "address street",
        "city": "Cairo",
        "state": "CAI",
        "country": "EG",
        "zip": "45555",
        "ip": "1.1.1.1"
    },
    "shipping_details": {
    "name": "FirstName LastName",
    "email": "[email protected]",
    "phone": "971555555555",
    "street1": "street2",
    "city": "dubai",
    "state": "dubai",
    "country": "AE",
    "zip": "54321"
    },
    "user_defined": {
    "test": "UDF1 Test",
    "test2": "UDF2 Test",
    "udf3": "UDF3 Test",
    "udf4": "UDF4 Test",
    "udf5": "UDF5 Test",
    "udf6": "UDF6 Test",
    "udf7": "UDF7 Test",
    "udf8": "UDF8 Test",
    "udf9": "UDF9 Test"
    },
    "callback":"** Valid callback URL **",
    "tokenise": 2,
    "payment_token": "Dh4r8Jwt7x6tPMVzKgtk"
}
- Via Non-3DSecure Cards
- Via 3DSecured Cards
If the card does NOT require 3DSecure authentication from the cardholder and issuer side, You will receive a response like the following:
{
"tran_ref": "TST2433801966216",
"tran_type": "Sale",
"cart_id": "CART#1001",
"cart_currency": "SAR",
"cart_amount": 500,
"cart_description": "Description of the items/services",
"tran_currency": "SAR",
"tran_total": "500",
"return": "** Valid Return URL **",
"customer_details":
{
    "name": "Technical Support Team",
    "email": "[email protected]",
    "phone": "+201234567890",
    "street1": "address street",
    "city": "Cairo",
    "state": "CAI",
    "country": "EG",
    "zip": "45555",
    "ip": "1.1.1.1"
},
"shipping_details": {
    "name": "FirstName LastName",
    "email": "[email protected]",
    "phone": "971555555555",
    "street1": "street2",
    "city": "dubai",
    "state": "dubai",
    "country": "AE",
    "zip": "54321"
},
"payment_result": {
    "response_status": "A",
    "response_code": "184345",
    "response_message": "Authorised",
    "acquirer_message": "00:Approved",
    "acquirer_rrn": "433812184345",
    "transaction_time": "2024-12-03T12:29:52Z"
},
"payment_info": {
    "payment_method": "MasterCard",
    "card_type": "Credit",
    "card_scheme": "MasterCard",
    "payment_description": "5500 00## #### 5559",
    "expiryMonth": 12,
    "expiryYear": 2026
},
"serviceId": 15,
"token": "2C4654BD67A3E436C6BE90FA67847CBE",
"profileId": ****50,
"merchantId": **464,
"trace": "PMNT0402.674EF9B7.000DAFF6"
}
You can notice that the payment is already made, A transaction has been created, and you are already receiving the payment results, unlike the following scenario, since the issuer required no 3DSecure, the transaction had been created.
If the card does require the 3DSecure authentication from the cardholder and issuer side, You will receive a response like the following:
{
"tran_ref": "TST2433801966233",
"tran_type": "Sale",
"cart_id": "CART#1001",
"cart_description": "Description of the items/services",
"cart_currency": "SAR",
"cart_amount": "500.00",
"tran_currency": "SAR",
"tran_total": "500.00",
"return": "** Valid Return URL **",
"redirect_url": "https://secure.paytabs.com/payment/page/5DBD3BA582E5CAABEC5B517D8C49E7486550540A11AE9AA7F65428DC/redirect",
"customer_details": {
    "name": "Technical Support Team",
    "email": "[email protected]",
    "phone": "+201234567890",
    "street1": "address street",
    "city": "Cairo",
    "state": "C",
    "country": "EG",
    "zip": "45555",
    "ip": "1.1.1.1"
},
"shipping_details": {
    "name": "FirstName LastName",
    "email": "[email protected]",
    "phone": "971555555555",
    "street1": "street2",
    "city": "dubai",
    "state": "DU",
    "country": "AE"
},
"payment_info": {
    "payment_method": "Visa",
    "card_type": "Credit",
    "card_scheme": "Visa",
    "payment_description": "4111 11## #### 1111",
    "expiryMonth": 12,
    "expiryYear": 2026
},
"serviceId": 15,
"profileId": ***150,
"merchantId": **464,
"trace": "PMNT0402.674EFEBC.000DBA66"
}
Regarding Managed Form | Payment Workflow, by initiating the payment, and if the card is 3DSecured, you will receive the redirect URL (redirect_url) within the response. Use this URL to redirect your client browser to the issuer 3DSecure page.
Once the cardholder authenticates using the card (E.G., via OTP), the customer will be redirected back to the return page if it had been set or to the PayTabs default transaction result page if no return page was set. To check more about this, you can navigate to the return URL parameter manual.
Expected Payment Flow Behavior
As mentioned above in the Frond-end Side section ( integration payment Form), As a merchant you would initiate a payment request per the above Specifications,including the Payment_token you will receive ,same as the sample codes mentioned in the samples section above.
- Card Authentication Check
- If the card is not 3D Secure (3DS), the payment will proceed immediately without any further redirects.
- If the card is 3D Secure, the payment request will include a, redirect URL, in the response, as the following
"redirect_url": "https://secure.paytabs.com/payment/page/599458B182E5B6B********************B4818688", - Redirect to 3DS Authentication (If Applicable):
- If the response includes a redirect URL, this means the card is 3D Secure, and the customer will be redirected to their issuer’s 3DS/OTP page to complete the authentication process
- Return to Merchant's Page
- After completing the authentication, the customer will be redirected back to your return URL, where they will see the result of the payment attempt
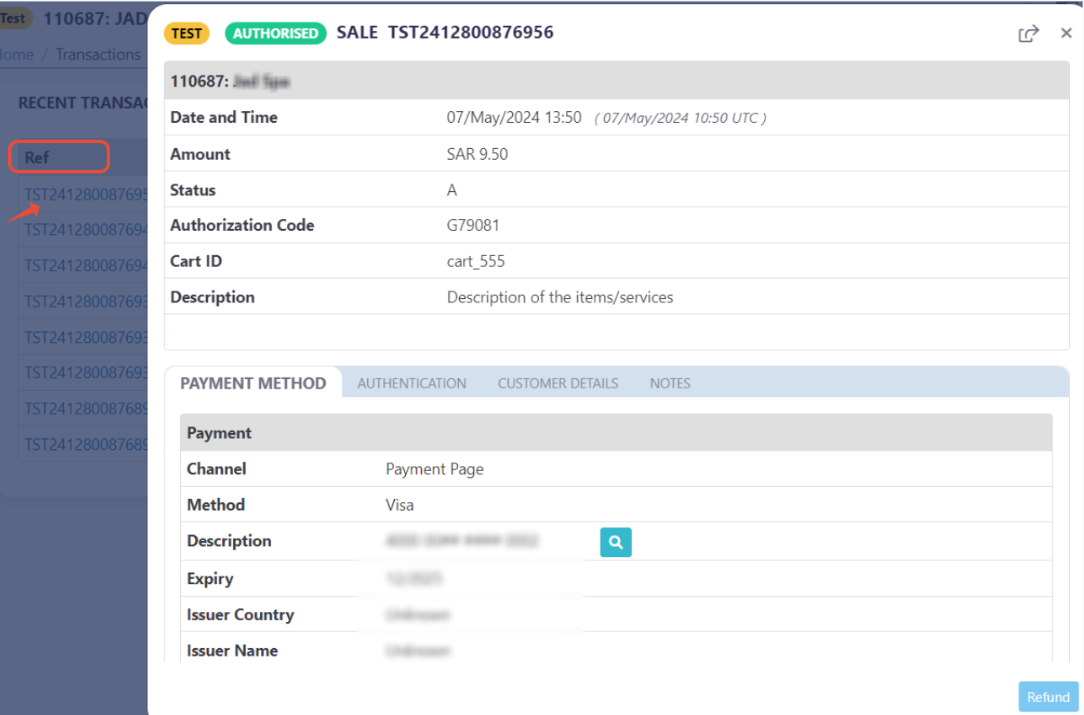
Finally, you will be able to see his transaction on your merchant dashboard, whether it's accepted/authorized or not.