/* @created September 2024 */
Request/Response: Return URL (return)
This parameter ONLY working with those integration types (Hosted Payment Page, Managed Form, Own Form, and Invoices(Payment Endpoint)).
The Return is one of the optional parameters that you can use while initiating a payment request. It is the URL where customers are redirected after completing the payment process. It plays a crucial role in providing feedback to both the merchant and the customer about the status of the transaction.
Next, we can delve into the specifics of how to implement the return parameter in your requests.
How this parameter could benefit you?
Here are some scenarios to help you understand when to use the return parameter:
- Redirect your customers back to your website/store after a payment, after completing the payment regardless of it status (authorized, declined, cancelled, etc)
- It can be used as a transaction response as it will contain the basic transaction details within.
Limitations
- No Limitations: This parameter can be used with all types of integrations with no limitations
- If you are not using HTTPS return URL you will not get transaction details payload within the return
How to Use?
In order for you to start use the return parameter, you kindly need to follow the below simple steps:
- Within the initiation of the request payload of the payment page/invoice in Step 3 via any of the supported integration types by this parameter, you will use the mandatory parameter
returnwithin the main request payload itself as shown below:{
...
"return": "https://example.com/order/10001",
....
} - Once you post your request, you will receive a response that includes the
return:{
...
"return": "https://example.com/order/10001",
....
} - Finally some transactions type are direct transactions that don't need any further payment process and other will need to you to redirect the customer to a page for either authenticate the cardholder via the 3D Secure or processed with asking to fill the bank card details within the payment page. You may need to check his customer experience after in the coming Expected Payment Flow Behavior.
Parameter Specifications
-
returnParameter returnDescription The return URL is the URL that PayTabs will redirect the customer to after he finishes the payment process (whether it's authenticated or not). It will redirect the customer with a POST response that is sent with the client/cardholder redirection through his browser containing the basic transaction information once the payment process ends (whether the customer cancels, paid, or failed to pay). It depends on the customer's actions, which means if the customer closes the browser right after the payment without waiting to be redirected back to your system, you will not receive this response.
What is the Return URL vs the Callback URL?
To know more about this parameter please click here.Data Type STRING Required ✘ Min N/A Max 255 Characters (Valid URL) Validation Rules - Valid URL
- Recommended to pass it as an HTTPS URL, otherwise, will reflect on the response behavior.
Sample {
"return": "https://example.com/order/10001"
}
Request & Response Payloads Samples
- Hosted Payment Page
- Invoices
The below sample request payload will show you how you can pass the above-mentioned required parameter, which are needed to be passed with valid values to perform a request. Along with the response payload received after using this request payload.
- Request Sample Payload
- Response Sample Payload
{
    "profile_id": {{profile_id}},
    "cart_type": "sale",
    "tran_class": "ecom",
    "cart_id": "CART#1001",
    "cart_description": "Description of the items/services",
    "cart_amount": 25000.2,
    "cart_currency": "SAR"
}
{
    "tran_ref": "TST22********159",
    "cart_type": "Sale",
    "cart_id": "CART#1001",
    "cart_description": "Description of the items/services",
    "cart_currency": "SAR",
    "cart_amount": "500.00",
    "return": "none",
    "redirect_url": "https://secure.paytabs.com/payment/page/599458B182E5B6B********************B4817FD44318539688688",
    "serviceId": 2,
    "profileId": 9*****4,
    "merchantId": 1*****7,
    "trace": "PMN****4.63****A8.00****C4"
}
The below sample request payload will show you how you can pass the above-mentioned required parameter, which are needed to be passed with valid values to perform a request. Along with the response payload received after using this request payload.
- Request Sample Payload
- Response Sample Payload
{
    "profile_id": {{profile_id}},
    "cart_type": "sale",
    "tran_class": "ecom",
    "cart_currency": "SAR",
    "cart_amount": "9.5",
    "cart_id": "CART#1001",
    "cart_description": "Description of the items/services",
],

    "invoice": {

        "line_items": [
            {
                "unit_cost": 9.5,
                "quantity": 1,

            }
        ]
    }
}
{
    "tran_ref": "TST22********159",
    "cart_type": "Sale",
    "cart_id": "CART#1001",
    "cart_description": "Description of the items/services",
    "cart_currency": "SAR",
    "cart_amount": "9.5",
    "return": "none",
    "redirect_url": "https://secure.paytabs.com/payment/page/599458B182E5B6B********************B4817FD44318539688688",
    "serviceId": 2,
    "profileId": 9*****4,
    "merchantId": 1*****7,
    "trace": "PMN****4.63****A8.00****C4"
}
Expected Payment Flow Behavior
- Hosted Payment Page
- Invoices
- As mentioned above in the How to use? section, As a merchant you would initiate a payment request per the above Specifications, same as the sample codes mentioned in the samples section above.
- Then, you will receive a response that includes redirect URL. This means you have initiated a correct payment request/page successfully.
"redirect_url": "https://secure.paytabs.com/payment/page/599458B182E5B6B********************B4818688", - Next, you should embed this url inside your checkout page directly using the needed mark up tags
- After this, your customer would proceed normally with payment by providing his card information, and he will be able to do that withing your story as you can see below:
- Then, he will be redirected to his issuer bank 3DS/OTP page to authenticate the used card
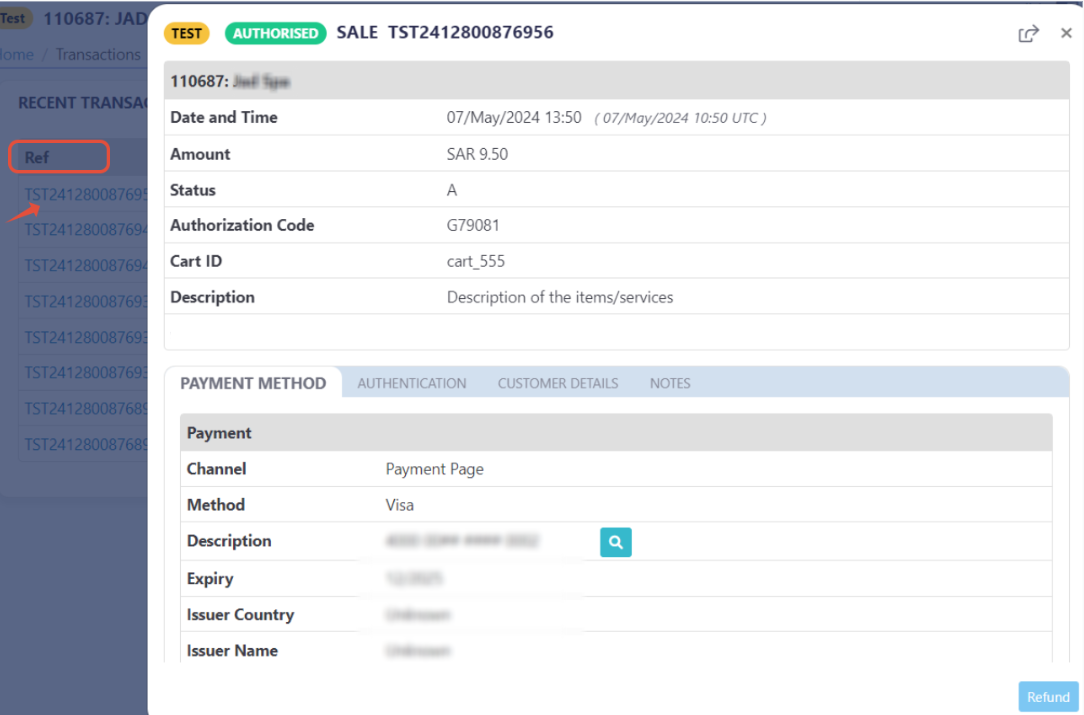
- Finally, he would be redirect to a success/error page accordingly. By this time, you will be able to see his transaction on your merchant dashboard, whether it's accepted/authorized or not.

- As mentioned above in the How to use? section, As a merchant you would initiate a payment request per the above Specifications, same as the sample codes mentioned in the samples section above.
- Then, you will receive a response that includes redirect URL. This means you have initiated a correct payment request/page successfully.
"redirect_url": "https://secure.paytabs.com/payment/page/599458B182E5B6B********************B4818688", - Next, you should embed this url inside your checkout page directly using the needed mark up tags
- After this, your customer would proceed normally with payment by providing his card information, and he will be able to do that withing your story as you can see below:
- Then, he will be redirected to his issuer bank 3DS/OTP page to authenticate the used card
- Finally, he would be redirect to a success/error page accordingly. By this time, you will be able to see his transaction on your merchant dashboard, whether it's accepted/authorized or not.